Uncle Steve's Homemade Granola


My Uncle Steve makes the best granola.  I quite literally look forward to trips to the Michigan cottage so that I can enjoy a heaping bowl of it each morning. He had just roasted a big batch when I arrived this past summer and I carried a half gallon bag home on the plane.

After getting my sticky paws on the recipe, I decided to share it with you here since it is a cinch to whip up (mix, toss, roast!) and provides weeks of morning enjoyment.  I am even toying with the idea of bagging it up for holiday gifts this year at the office. Who wouldn't prefer homemade granola over a cheapey bottle of red wine? Okay, maybe that's the pregnant me writing.

But.... there is a big but. If I am honest, it is really is a stretch to call this recipe local. While I purchased the goods from freshdirect.com and the labels "say" bagged in New York, I clearly know coconuts don't grow on trees here in Westchester. The one local component is the honey. Delicious local honey procured at the farmer's market. So forgive me, dear reader, for bending the rules with this recipe.  Roast this granola yourself and I trust all will be forgiven.

Uncle Steve's Homemade Granola
Ingredients
  • 5 cups old fashioned oats (not instant)
  • 1 cup wheat germ
  • 1 cup unsweetened coconut chips
  • 1 cup unsalted sunflower seeds
  • 1 cup pumpkin seeds/pepitas
  • 1/4 cup sesame seeds
  • 1/2 cup flax seeds
  • 1/2 cup chopped unsalted nuts of your choice (almonds, walnuts etc.)
  • 1/2 cup safflower oil
  • 3/4 - 1 cup of local honey 
Directions
  • Pre-heat the oven to 225 degrees
  • Mix all the dry ingredients together
  • Warm the oil and honey, and pour into the dry ingredients.  Mix well to coat
  • Bake for 2.5 - 3 hours, stirring well every half an hour 
  • Store in sealed containers and enjoy! 

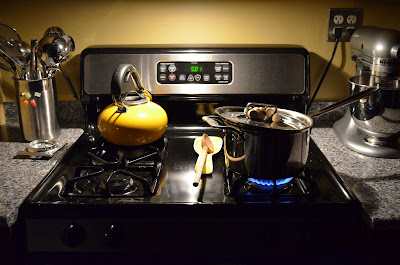
The start
The dry ingredients
Local honey
The final product: delicious granola to enjoy with milk and fruit

Thanksgiving: The Day After

I am so obsessed with Thanksgiving stuffing that at this point my favorite part of the holiday may just be breakfast the day after: a poached egg over reheated stuffing! Here is what we enjoyed on Friday. I'll post the recipe soon. This one is so good there's no reason not to enjoy it all winter!

Spicy Sweet Potato Wedges


As U.S. Thanksgiving approaches, I thought I'd share a simple and savory sweet potato recipe. I've never taken to the marshmallow version that adorns many tables in late November. I am all for tradition, but marshmallow WITH a vegetable? It actually frightens me a little. I've gone the totally opposite route below tossing sweet potatos with chili oil for a banging result.

This year I have many things to be thankful for:  Our first home, the upcoming arrival of our first child, ours and our families health, this blog... my cup runneth over. Thank you for continuing to read about my cooking adventures.  My food blogosphere may be small, but I can't tell you just how much I am enjoying documenting my time in the kitchen.

Wishing you and yours a wonderful, and marshmallow free, Thanksgiving!!

Fiery Sweet Potato Wedges
Ingredients
  • 4 to 5 sweet potatoes, peeled and sliced into 1/3 inch wedges
  • Chili Pepper Oil (or Olive Oil with a teaspoon of Red Pepper Flakes)
  • Salt & Pepper
Directions
  • Pre-heat the oven to 375 degrees
  • Line a baking sheet with parchment paper
  • Toss the sweet potato wedges with chili oil to coat, 2 - 2.5 tablespoons for wedges from 4-5 small sweet potatoes
  • Arrange the wedges in a single flat layer on the paper, and sprinkle with kosher salt and a few good cracks of pepper
  • Bake for 15-25 minutes until darkened but not burned.  While this sounds like a wide range, the thickness of your baking sheet and wedges combined with varying oven powers will grateful influence cooking time.  Enjoy!
Before
 After
 

Why I love Fall...

Carrot & Butternut Squash Soup


Dipping a hunk of crusty bread into a bowl of homemade soup. Does it get any cozier than that? Fall is my absolute favorite season. Changing leaves, crisp air, sweaters, root vegetables, apples, simmering pots of goodness like the one above... that is pure happiness to me.

As my CSA share winds down (just one left, tear tear!), the root vegetables are in high supply.  We have a lot, and I mean a lot, of carrots.  If you have any carrot recipes to share, I'd love hear them in the comment section below.

The following soup recipe is a rustic, no muss no fuss preparation.  The optional addition of some cream or milk will richen it up.  I omitted in mine, and am enjoying this for lunch at work with a dollop of Greek Yogurt and a healthy handful of crackers.

Carrot & Butternut Squash Soup
Ingredients
  • 1 large or 2 medium butternut squash, peeled and chopped into chunks
  • 5 large carrots peeled and sliced
  • 1 large onion, diced
  • 1 tablespoon olive oil
  • 1 teaspoon dried sage
  • 1/2 teaspoon cayenne pepper
  • 5 cups of chicken or vegetable broth
  • 4 cloves garlic, minced
  • Optional: 1/2 cup of milk or cream

Directions
  • Heat the olive oil in a stock pot over medium heat until glistening.  Add the onion and garlic, and saute for 3 minutes until glistening. 
  • Add the carrots, and saute for 3 minutes. 
  • Toss in the butternut squash to coat, and top off with the stock, sage and cayenne.  Bring to a boil, and then reduce heat to simmer.  Simmer for 25 minutes under tender. 
  • Puree using an immersion blender, food processor or blender. 
  • If you'd like a creamier taste, stir in the milk or cream. 
  • Serve with chunky bread for dipping.  


      Butternut Squash and Swiss Chard Lasagna


      Our best couple friends here in New York just had a baby. Wasn't it kind of them to get going on all this just months before we do so we can inundate them with questions at every turn?  I think so!!!  A few weekends ago, I had grand plans to bring over dinner to visit with the baby and catch up with the new parents.... then an icky cold struck me down.

      Instead, I ended up baking a meal and dropping it off for the new parents to enjoy.  It included Coconut & Lime's butternut squash and swiss chard lasagna. They confirmed its goodness so I've shared the recipe here. I must admit to being *slightly* chard out with my CSA, so I loved using up a big bunch in such a tasty way.  I've added in a tomato-based top layer, unlike Coconut & Lime's version, simply because I like that kick of acidity.

      P.S. You will notice there are no pictures of the final product -- I had them bake it to serve warm.

      Butternut Squash & Swiss Chard Lasagna
      Courtesy of Coconut & Lime
      Ingredients
      • 1 large butternut squash, sliced in half lengthwise and seeds removed
      • 1/4 cup Parmesan
      • 1 lb no-cook lasagna noodles
      • 1 large bunch Swiss chard, rinsed and chopped into ribbons
      • 1 medium onion, diced
      • 15 oz ricotta cheese
      • 1 tablespoon olive oil
      • 1 teaspoon chopped or dried sage
      • 1 teaspoon paprika
      • 1/8 teaspoon nutmeg
      • 3 cups milk
      • 3 tablespoons grated Parmesan 
      • 3 tablespoons butter
      • 3 tablespoons flour
      • 2 cloves garlic, minced
      • salt & pepper
      • 1 cup of tomato sauce
      Directions
      • Preheat oven to 400F. 
      • Brush the butternut squash with a little olive oil. Place on a parchment lined baking sheet. Bake for 30-40 minutes or until fork tender. Allow to cool slightly. Scoop out the insides and mash.  Turn the oven down to 375F. 

      • Filling: Heat oil in a large skillet. Saute the onion until fragrant, then add the chard and sage. Saute until the chard is soft, about 3 minutes. Turn off the burner and allow to cool slightly before combining with the ricotta, nutmeg, salt, pepper and paprika.
      • Sauce: Melt the butter in a sauce pan.  Whisk in the flour, garlic and a few cranks of salt and pepper. Add the milk and whisk together until slightly thickened. Stir in Parmesan.
      • Assembly: Spread a thin layer of white sauce on the bottom of a 9x13 inch pan. Top with noodles then layer with a layer of squash then the chard-ricotta mixture and drizzle with sauce. Repeat, until out of noodles. 
      • Top with 1 cup of tomato sauce & sprinkled Parmesan cheese.  Bake covered for 30-35 minutes . Allow to sit about 5 minutes before slicing and serving.

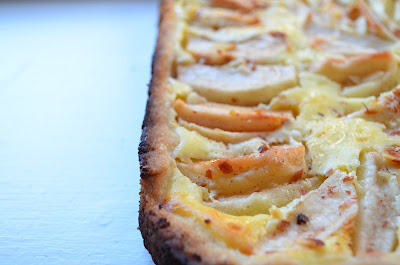
      Pear & Cream Cheese Tarts

      We closed the house in Montauk this past weekend, always a sad activity.  With the baby due date approaching, it seemed wise to close early.

      To mark our last weekend 'out east', a good friend invited us to a dinner party. She whipped up one of my favorite fall Martha recipe's, pot-au-feu, and a particularly juicy roasted chicken.  I created the little guys below for dessert. I wish I had thought to take a picture of the table.  Candles burning, fresh cut flowers, a table of friends... it was the perfect end to our Montauk season.

      The recipe looks complicated because of the length, but that is truly not the case. I combined a few favorite desert components for a quick baking treat. The crust bakes just once, unlike many tarts where the crust bakes first, and the pear and cream cheese filling are a cinch to pull together.  Enjoy!

      Perfect Pear Cream Cheese Tarts
      Ingredients
      For the Crust(s):
      • 1 cup all-purpose flour
      • 1/4 teaspoon salt 
      • 1/3 cup confectioners (powdered or icing)
      • 1/2 cup cold unsalted butter, cut into small pieces
      For the Filling:
      • One 8-ounce cream cheese, at room temperature
      • 1/4 cup sugar
      • 1 large egg
      • 1/2 teaspoon vanilla extract
      For the Pears:
      • 5-6 pears, cored, peeled
        • Note: If you are making the individual tarts, chop the pears into bite size pieces. If using one pan, slice into 1/4th wedges
      • 1/4 cup sugar
      • Juice of 1/2 lemon
      Directions
      • Preheat oven to 350F and place rack in center of oven.
      • Butter or spray either 6 mini tart tins like these, or a 9 inch spring form pan. 
      • Crust: In your food processor, pulse the flour, salt, and sugar together.
      • Add the butter and pulse until dough just begins to come together. If you don't have a food processor, you can mix by hand with two knifes.
      • Spoon the dough onto the bottom of the mini tarts or pan, and flatten out across the bottom and up the sides.
      • Cover with plastic wrap and place in the fridge.
      • For the Filling: Blend of food process the cream cheese until smooth. Add the sugar and mix well.
      • Blend in the egg and vanilla extract and process until smooth. Remove the crust from the fridge and scoop 1.5 tablespoons in each mini tart, or pour a thin layer of filling in a larger pan.  If you are making the mini-tarts, you will have leftover filling. 
      • Return to the fridge while you prepare the topping.
      • For the Topping: Combine the sugar and lemon juice in a bowl. Toss the pears in the sugar mixture. Arrange evenly over the cream cheese layer.
      • Bake at 350 for 18-20 minutes in small tarts or 25 to 35 minutes in the single pan, until the crust is brown and the filling is almost set. Remove from oven and place on wire rack to cool.
      • Sprinkle with confectioners sugar and serve at room temperature.


        Related Posts Plugin for WordPress, Blogger...
         
        BLOG DESIGN BY DESIGNER BLOGS